よくあるご質問
質問
How to Install a Printer Driver ? (Network Connection)(FAQ No.01206)
対象環境
AR-B350W / BP-20C25 / BP-21C20 / BP-22C20 / BP-30C25 / BP-30M28 / BP-30M31 / BP-30M31L / BP-30M35 / BP-40C26 / BP-40C36 / BP-41C26 / BP-41C36 / BP-50C45 / BP-50C55 / BP-50C65 / BP-51C45 / BP-51C55 / BP-51C65 / BP-60C26 / BP-60C31 / BP-60C36 / BP-61C26 / BP-61C31 / BP-61C36 / BP-70C26 / BP-70C45 / BP-70C55 / BP-70C65 / BP-70M45 / BP-70M55 / BP-70M65 / BP-70M75 / BP-70M90 / BP-71C26 / BP-71C36 / BP-71C45 / BP-71C55 / BP-71C65 / BP-71M45 / BP-71M55 / BP-71M65 / BP-80C80 / BP-C131WD / BP-C533WD / BP-C533WR / DX-20C20 / MX-2630FN / MX-2631 / MX-2650FN / MX-2650FV / MX-2661 / MX-3150FN / MX-3150FV / MX-3161 / MX-3630FN / MX-3631 / MX-3650FN / MX-3650FV / MX-3661 / MX-4150FN / MX-4150FV / MX-4151 / MX-4170FN / MX-4170FV / MX-4171 / MX-5150FN / MX-5150FV / MX-5151 / MX-5170FN / MX-5170FV / MX-5171 / MX-6150FN / MX-6150FV / MX-6151 / MX-6170FN / MX-6170FV / MX-6171 / MX-8081 / MX-B455W / MX-C305W / MX-C306W / MX-M1056 / MX-M1206 / MX-M3531 / MX-M4070 / MX-M4071 / MX-M5070 / MX-M5071 / MX-M6070 / MX-M6071 / MX-M6570 / MX-M7570
回答
Operation Procedure
1. Select the product name and Country/Region of the printer driver to be installed.
Input the product name and Country/Region on the Driver/Software Download page.
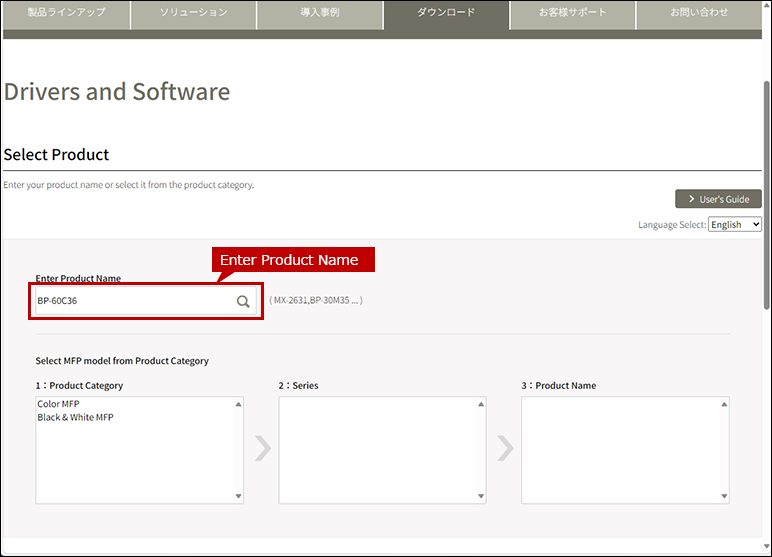
Next, select your language of Drivers/Software and click [NEXT].
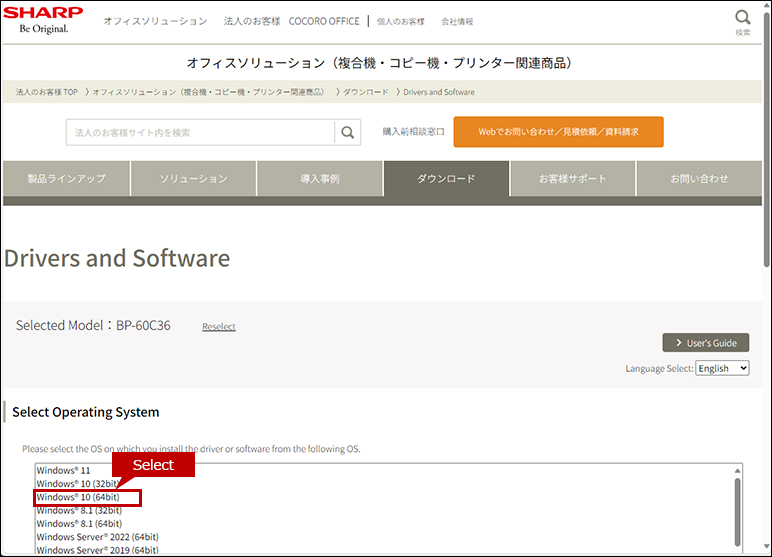
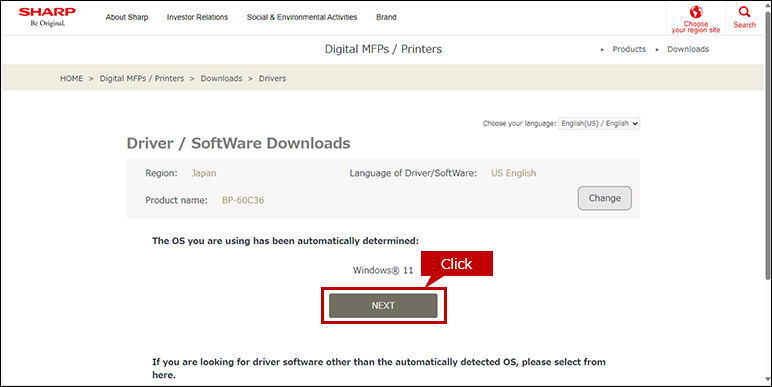
2. Select Operation System
The OS of your computer will be automatically determined, so click [NEXT].
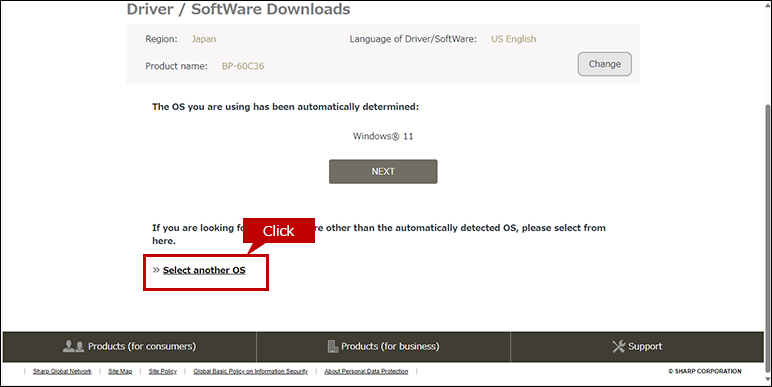
*If you want to select another OS, click [Select another OS].
◎ Reference :
3. Select a printer driver
A list of drivers will be displayed, so click on the printer driver.
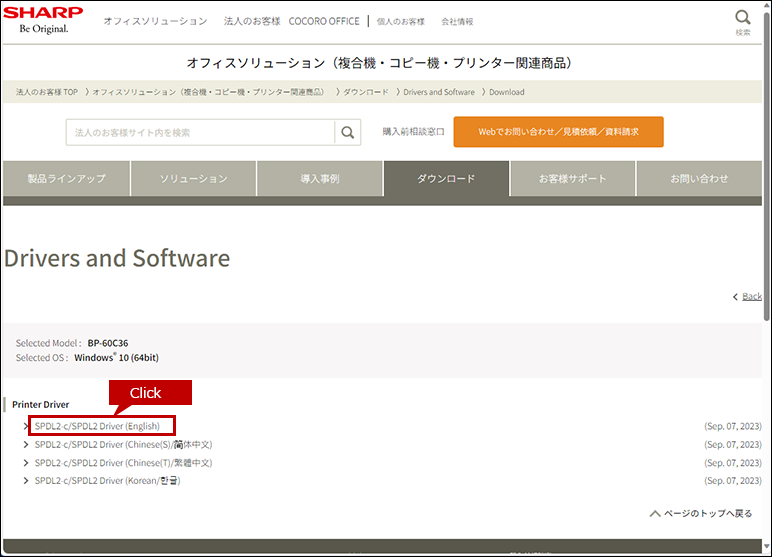
◎ If multiple printer drivers appear in the list.
select the driver according to your use environment.
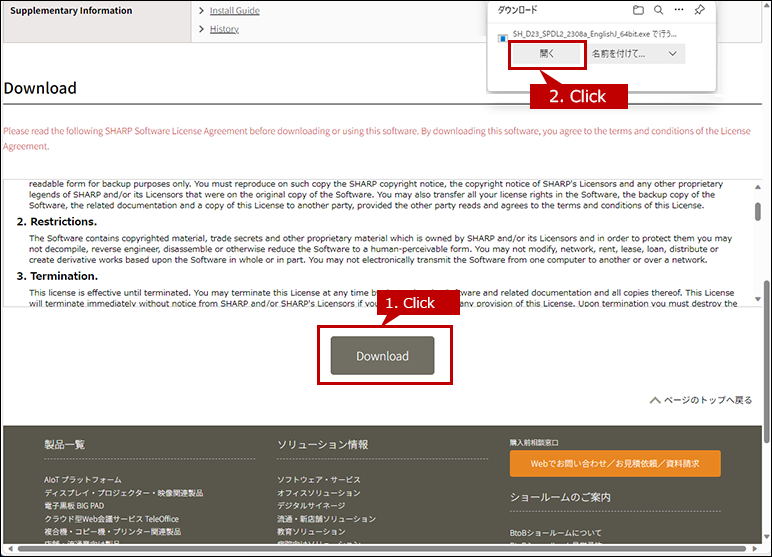
4. Click the [Download] button and click the [Run] button on the opened window.
According to your PC environment, sometime the file is automatically saved without opening a window. In that case, display the saved folder and double-click the file.
An Installation requires an administrator authority.
- - Right-click the stored file and click [Run as an administrator] on the displayed menu and execute the installation.
- - Type in the Admin Password if necessary.
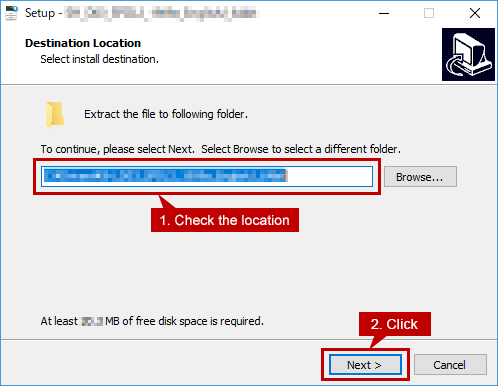
5. Select Where to Save the File.
Check where to save the file then click the [Next] button.
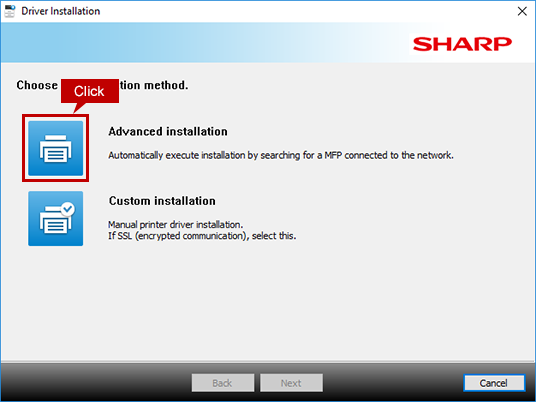
6. Select How to Install.
Click the [Advanced installation] icon.
When "Select a type of installation." screen appears.
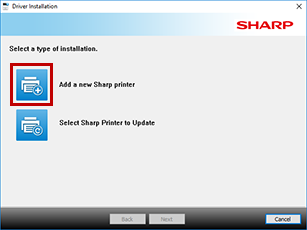
When [Add a new Sharp printer] icon is clicked, the screen transitions to above installation way selection screen.
This screen is displayed when a MFP using the same printer driver is registered as a printer or a previous version of the printer driver is installed.
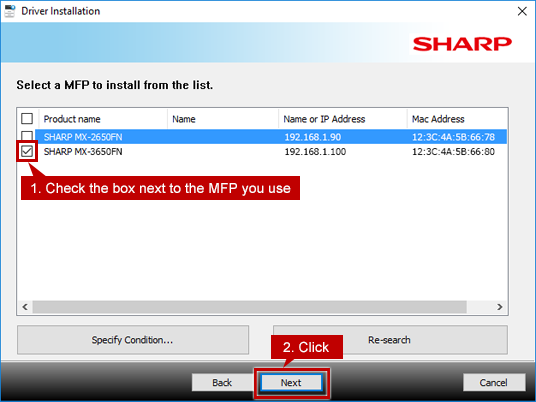
7. Select the Machine.
Check the box next to the MFP you use and click the [Next] button.
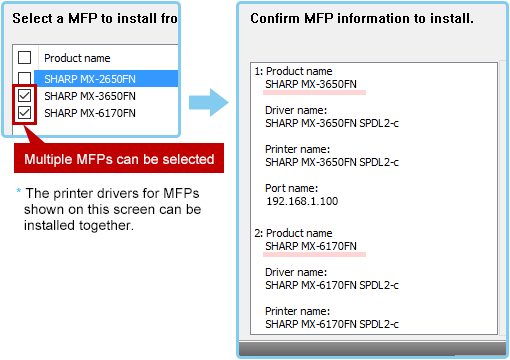
* The printer drivers for MFPs shown on this screen can be installed together.
Convenient function - Install the printer drivers for multiple MFPs at one time.
When only one MFP is detected.
- This screen is not displayed, and instead No. 6 screen is displayed.
If no MFP(s) detected.
- - Check : Does the MFP power on ?
- - Check : Does the PC and MFP are connected to the network properly ?
- - When there is no problem with those above, you can perform a search by clicking the [Specify condition] button.
Reference : When installing a printer driver, the machine is not detected. (Windows)
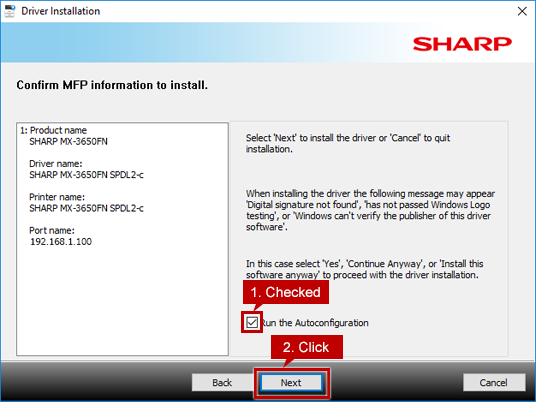
8. Check the MFP to Install and Start Copying Files.
Check the displayed information and click the [Next] button to start file-copying process.
* Do not remove the check for "Run the Auto configuration".
When a security warning window pops up.
- There is no problem with the printer driver so please click a button to continue the installation.
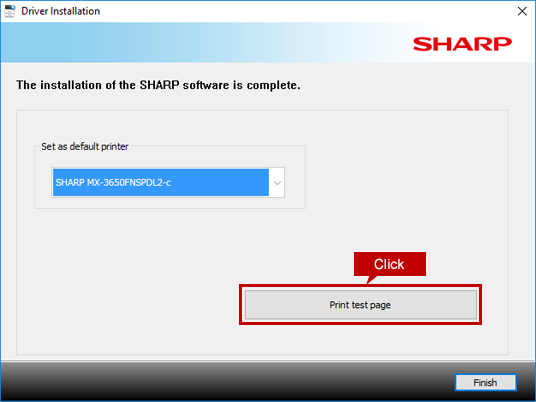
9. Print Test Page and Check Whether the Printer Driver is Successfully Installed.
Once the completion screen for the installation is displayed, click the [Print test page] button and check whether the test page is printed.
10. Select the Printer Driver Set as the Default Driver.
Select the default printer driver.
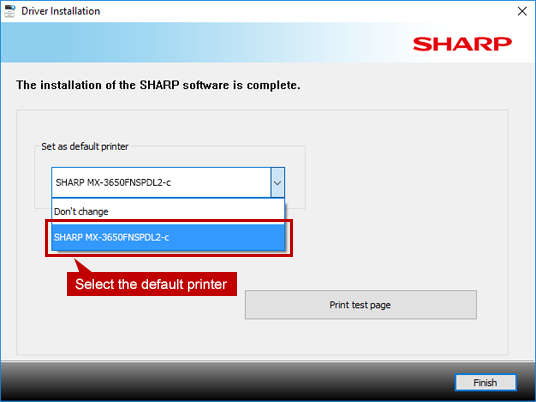
What is the default printer?
- - Set the printer usually used as the [default printer].
- - Select [Don't change] when you do not want to change the current [default printer].
- - The printer can be changed to another printer when printing.
11. Finish the Driver Installation.
Click the [Finish] button.
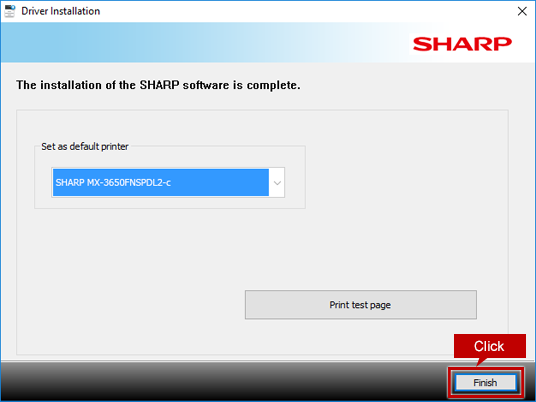
When a message is displayed to prompt the user to restart the PC.
- Click the [Yes] button and restart your PC.
Related Questions
- Network setting
How to confirm and change the IP address of the MFP & How to confirm the network connection between MFP and PC. - Setting after installation
How to set paper trays and finishers on the printer driver.
* The above setting is automatically finished in normal cases. - Print test pages
How to print test pages to check whether the print from PC is normally finished.
* This test print is usually done in printer driver's installation. - Language change for the operation panel and Web control screen
How to change the display language of operation panel or Web control screen.- BP-30C25 / MX-2631 / MX-2661 / MX-3161 / MX-3631 / MX-3661 / MX-4151 /
MX-4171 / MX-5151 / MX-5171 / MX-6151 / MX-6171 / MX-8081 / MX-C305W / MX-C306W- BP-40C26 / BP-40C36 / BP-41C26 / BP-41C36 / BP-50C45 / BP-50C55 / BP-50C65 / BP-51C45 / BP-51C55 / BP-51C65 / BP-60C26 / BP-60C31 / BP-60C36 / BP-61C26 / BP-61C31 / BP-61C36 / BP-70C26 / BP-70C45 / BP-70C55 / BP-70C65 / BP-71C26 / BP-71C36 / BP-71C45 / BP-71C55 / BP-71C65 / BP-80C80 /BP-70M45 / BP-70M55 / BP-70M65 / BP-70M75 / BP-70M90 / BP-71M45 / BP-71M55 / BP-71M65 / BP-C533WR / BP-C533WD / BP-C131WD / BP-22C20
- AR-B350W / BP-20C25 / BP-21C20 / DX-20C20
- BP-30M28 / BP-30M31 / BP-30M35 / BP-30M31L / MX-M1056 / MX-M1206 / MX-M3531 / MX-M4071 / MX-M5071 / MX-M6071
関連キーワード
Printer / Driver / Printer Driver / Install / Set up / Windows
各製品のよくあるご質問トップに戻る
AR-B350W / BP-20C25 / BP-21C20 / BP-22C20 / BP-30C25 / BP-30M28 / BP-30M31 / BP-30M31L / BP-30M35 / BP-40C26 / BP-40C36 / BP-41C26 / BP-41C36 / BP-50C45 / BP-50C55 / BP-50C65 / BP-51C45 / BP-51C55 / BP-51C65 / BP-60C26 / BP-60C31 / BP-60C36 / BP-61C26 / BP-61C31 / BP-61C36 / BP-70C26 / BP-70C45 / BP-70C55 / BP-70C65 / BP-70M45 / BP-70M55 / BP-70M65 / BP-70M75 / BP-70M90 / BP-71C26 / BP-71C36 / BP-71C45 / BP-71C55 / BP-71C65 / BP-71M45 / BP-71M55 / BP-71M65 / BP-80C80 / BP-C131WD / BP-C533WD / BP-C533WR / DX-20C20 / MX-2630FN / MX-2631 / MX-2650FN / MX-2650FV / MX-2661 / MX-3150FN / MX-3150FV / MX-3161 / MX-3630FN / MX-3631 / MX-3650FN / MX-3650FV / MX-3661 / MX-4150FN / MX-4150FV / MX-4151 / MX-4170FN / MX-4170FV / MX-4171 / MX-5150FN / MX-5150FV / MX-5151 / MX-5170FN / MX-5170FV / MX-5171 / MX-6150FN / MX-6150FV / MX-6151 / MX-6170FN / MX-6170FV / MX-6171 / MX-8081 / MX-B455W / MX-C305W / MX-C306W / MX-M1056 / MX-M1206 / MX-M3531 / MX-M4070 / MX-M4071 / MX-M5070 / MX-M5071 / MX-M6070 / MX-M6071 / MX-M6570 / MX-M7570
更新日:2026年06月15日