![]()


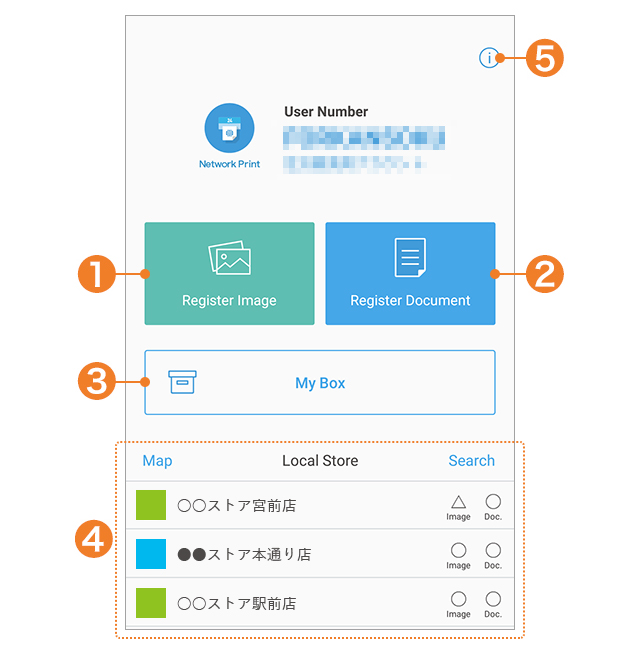
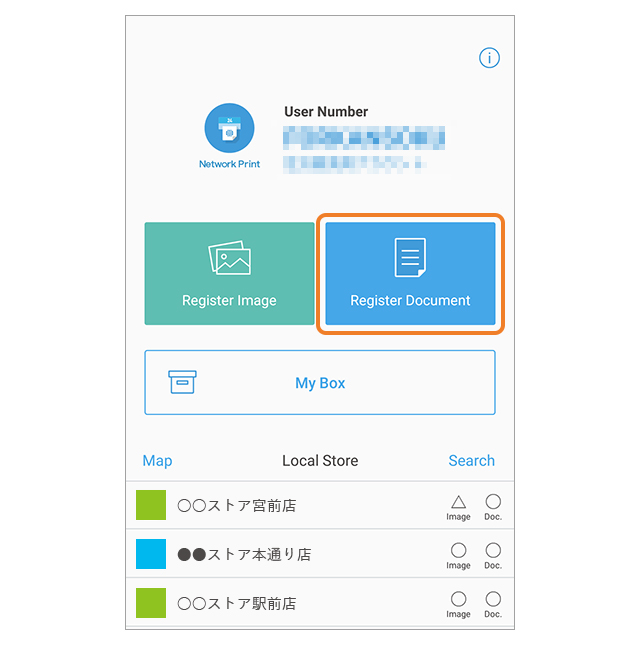
- 1) Register Image: Select to register images.
- 2) Register Document: Select to register files.
- 3) My Box: Select when wishing to check files registered with the Network Print service.
- 4) Local Store*: Check the location of the nearest convenience store using the location information on your device.
- 5) Settings and Information: Confirm Network Print settings, instructions for use*, and specifications.
- * Please view in an Internet-connected environment.


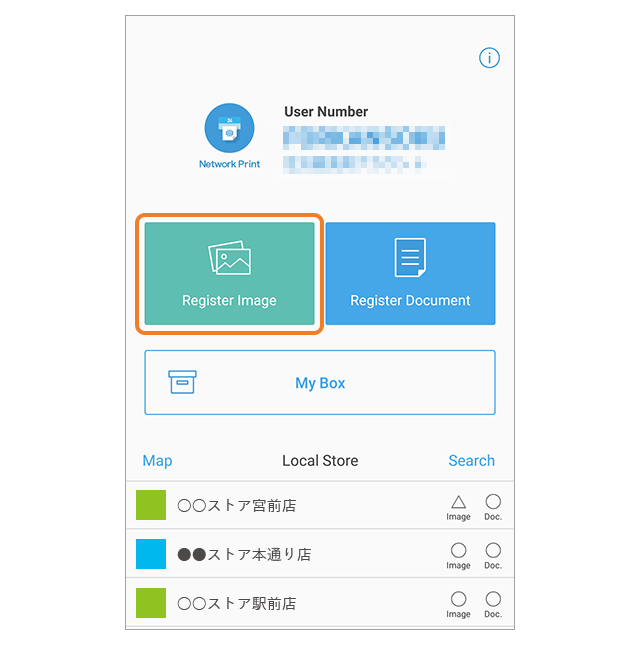
Tap the "Register Image" menu option in the Network Print app.

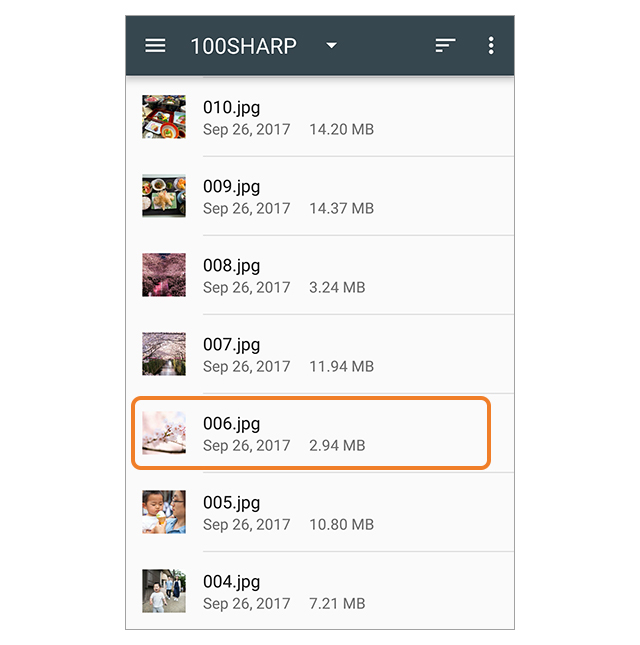
Tap the photo(s) you wish to print.
- * If there are multiple image viewer applications installed, an application selection screen will be displayed after tapping the "Register Image" menu option.
- * The steps may differ depending on the OS or app version.

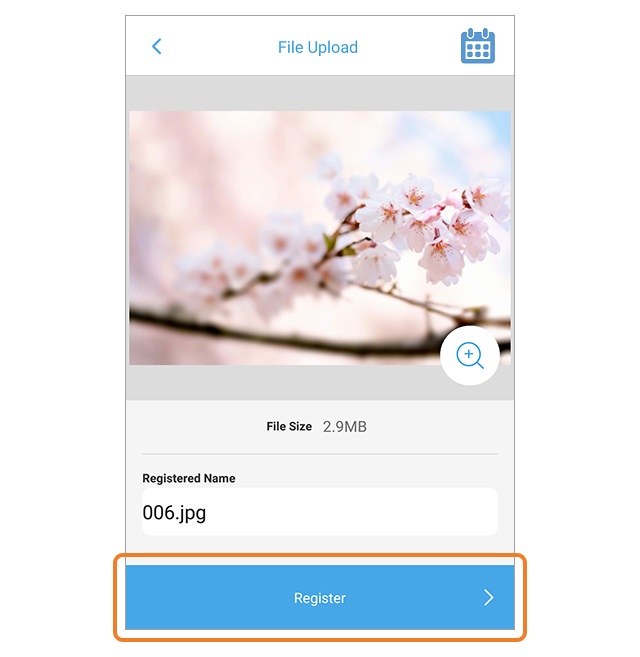
Register the file(s) by tapping "Register".


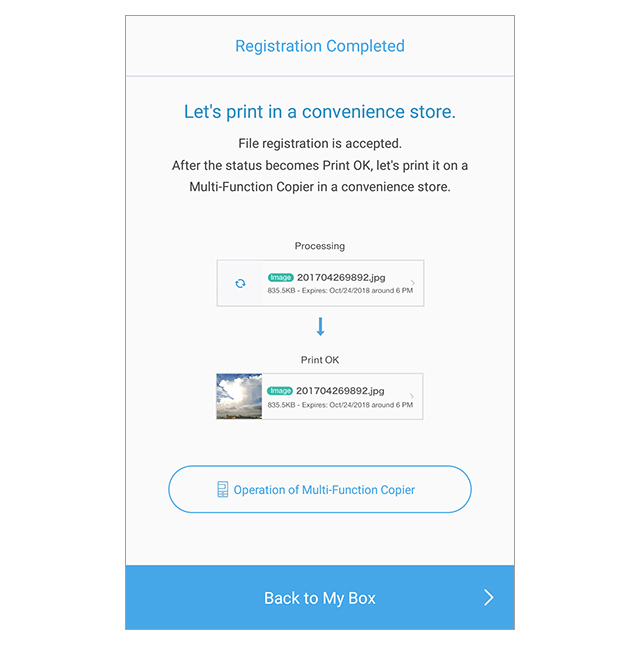
This message is displayed once the file registration process has been completed.


Tap the "Register Document" menu option from the Network Print app screen.

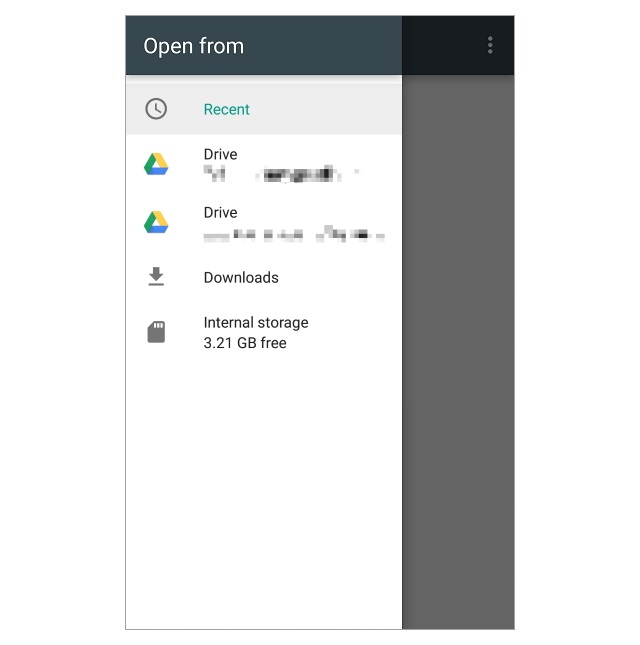
Tap the file you wish to register.
- * It is not possible to register file names that include the following characters.
¥ / : * ? “ < > | % &

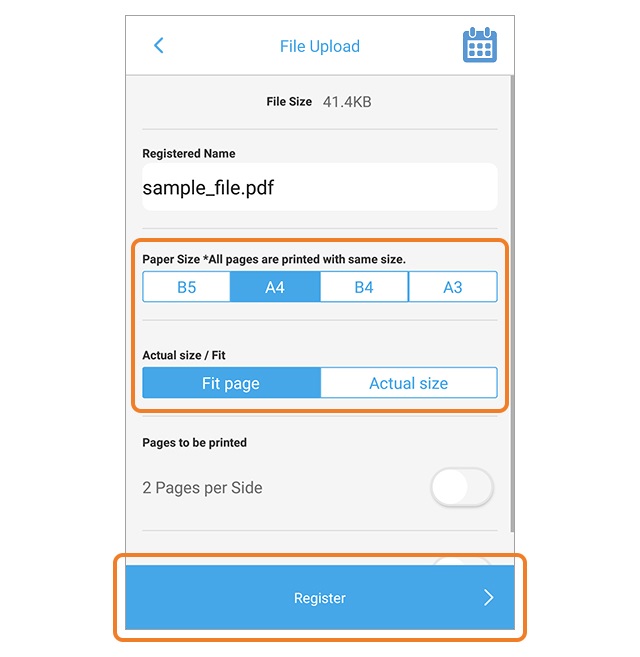
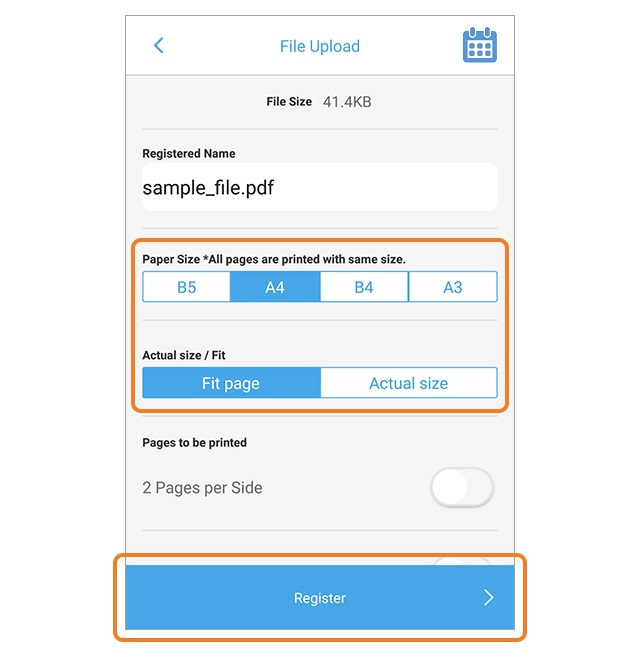
Select the paper size and tap the "Register" button.
- * For PDF files "Actual size / Fit" will be displayed. Select either "Fit page" or "Actual size".
- * For Excel® files "Sheets to be printed" will be displayed. Select either "Active Sheet" or "All Sheets".
- * If you wish to change the registered name, tap the entry field for "Registered Name" and enter the new name.
- * The following characters cannot be used in a registered name.
¥ / : * ? “ < > | % &


This message is displayed once the file registration process has been completed.


Bring up the email with the attached file(s) that you wish to register and open the attached file(s).
- * Here a PDF file is used as an example.
- * The steps may differ depending on the OS or app version.
- * It is not possible to register file names that include the following characters.
¥ / : * ? “ < > | % &

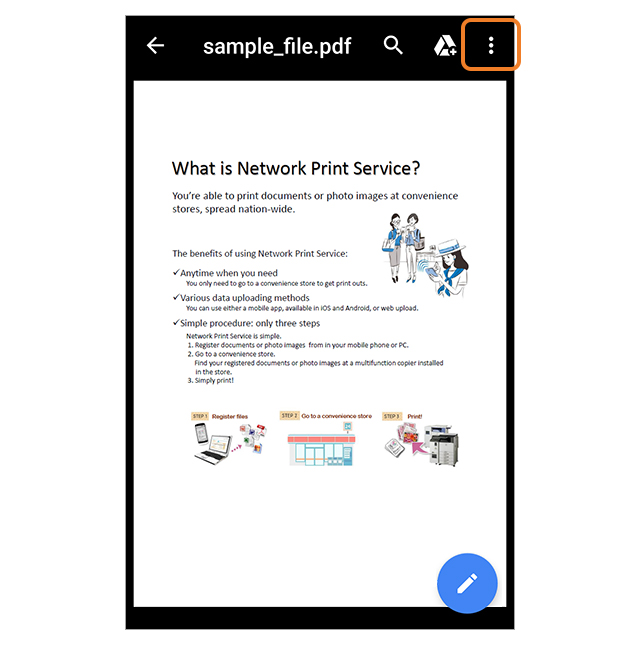
Tap the menu button at the top right of the screen.
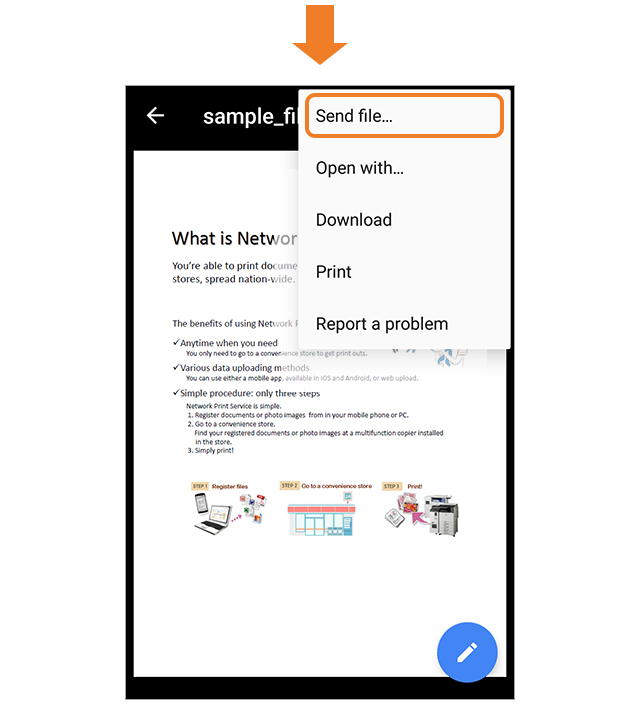
Select "Send file..." from the displayed menu.

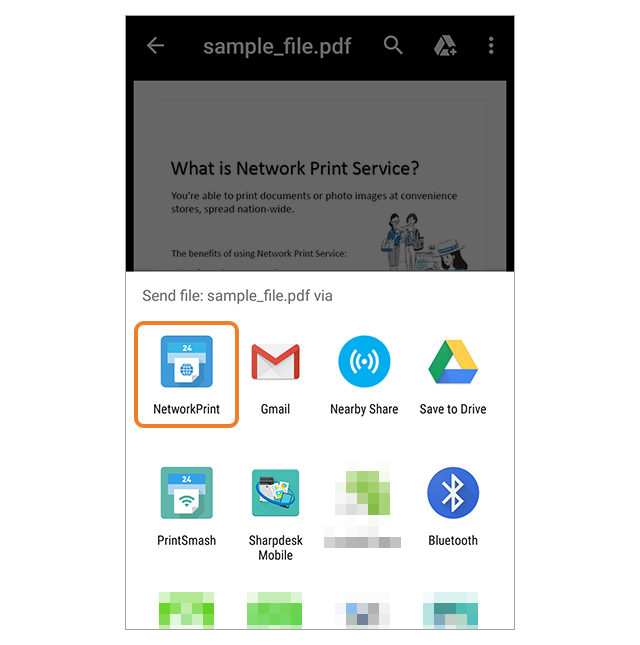
After tapping "Network Print" in the displayed menu, the document will be registered.

Select the paper size and tap the "Register" button.
- * For PDF files "Actual size / Fit" will be displayed. Select either "Fit page" or "Actual size".
- * For Excel® files "Sheets to be printed" will be displayed. Select either "Active Sheet" or "All Sheets".
- * If you wish to change the registered name, tap the entry field for "Registered Name" and enter the new name.
- * The following characters cannot be used in a registered name.
¥ / : * ? “ < > | % &

This message is displayed once the file registration process has been completed.


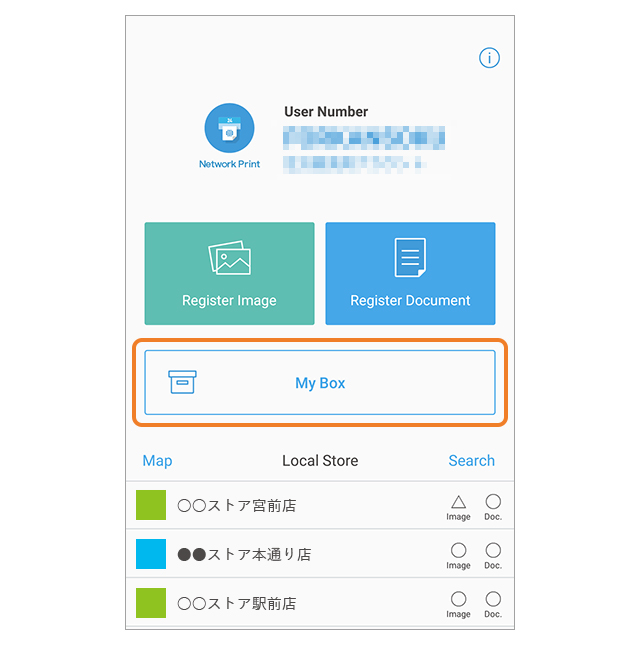
Tap "My Box" from the Network Print app screen.

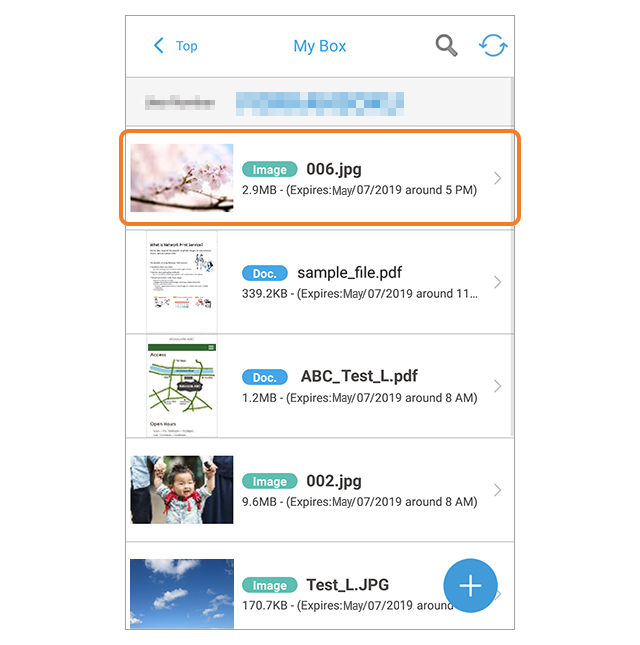
Tap the file you wish to inspect.

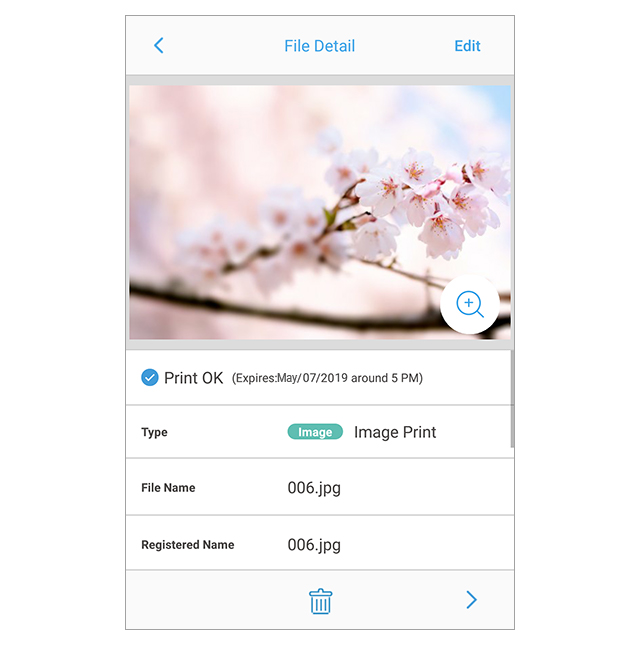
The file preview image is displayed.
- * While the printing status is indicated as "Processing", the file cannot be previewed. Please wait until the printing status indicates "Ready to print".


After photos or documents from your smartphone have been registered with the Network Print app, they can be printed at a convenience store with a Sharp multifunction copier.

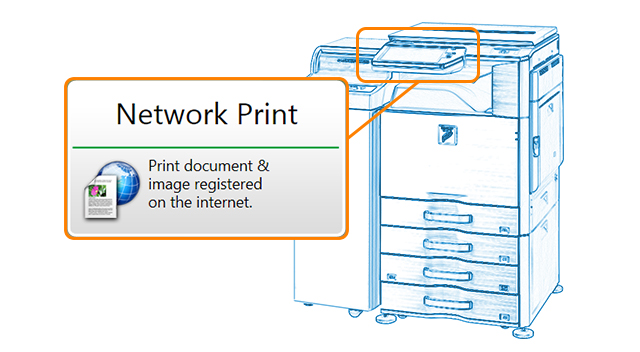
Select "Print Service" and then "Network Print" menu options in that order.

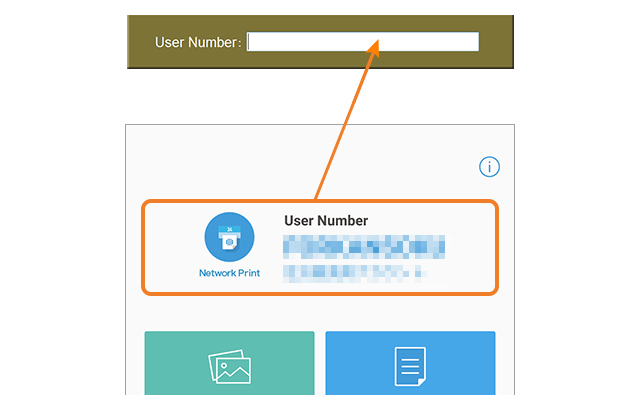
Enter the user number issued when registering for the service.
- * You can confirm your user number in the email that was sent after you registered.

After selecting either "Print documents" or "Print images", follow the on-screen instructions to print.
- * Charges apply for printing.

Download the NetworkPrint application.


- ● Excel is trademarks or registered trademarks of Microsoft Corporation in the U.S.A. and other countries.
- ● App Store is a service mark of Apple Inc. Apple, iPhone, iPad and Bonjour are trademarks of Apple Inc., registered in the U.S. and other countries. IOS is a trademark or registered trademark of Cisco in the U.S. and other countries and is used under license by Apple Inc.
- ● Android, Android logo, Google, Google logo, Google Play and Google Play logo are trademarks or registered trademarks of Google LLC.